Home » Wallcovering & Wallpaper Installation » Mastering wallpaper installation
Wallpaper installation requires more than applying adhesive and hanging strips on a wall. A successful installation depends on surface preparation, material compatibility, accurate layout, pattern alignment, and careful finishing.
Even a high-quality wallcovering can develop visible seams, bubbles, lifting edges, or pattern mismatches when these factors are overlooked.
At Enjoy The Wall, our installation team works with residential and commercial wallcoverings throughout Colorado. Our professional wallpaper installation services in the Denver metro area include technical planning, surface evaluation, and installation of materials ranging from traditional wallpaper to designer wallcoverings and custom murals.
This guide explains the essential tools, wall preparation requirements, installation steps, and common mistakes to consider before starting a wallpaper project.
The first step in wallpaper installation is identifying the material and understanding its installation requirements. Different wallcoverings can require different adhesives, preparation methods, seam treatments, and handling techniques.
Before opening the adhesive, check:
Wallpaper construction: Non-woven, paper-backed, vinyl, grasscloth, and other specialty materials behave differently during installation.
Installation method: The manufacturer may specify paste-the-wall, paste-the-paper, pre-pasted, or self-adhesive installation.
Pattern repeat and match: Straight-match, drop-match, and random-match patterns affect cutting, alignment, and material quantities.
Wall condition: Texture, moisture, damaged drywall, and poorly bonded paint can affect the finished result.
Roll identification: Dye lots, panel numbering, and installation sequence may be important for maintaining visual consistency.
Inspect the wallpaper for visible defects, color differences, and shipping damage before cutting. For murals and numbered panels, verify the complete sequence before installation.
If you are still selecting a material, Enjoy The Wall can help review products from the wallpaper brands we work with, evaluate technical requirements, and coordinate sourcing before installation.

Professional wallpaper installation uses a combination of measuring, cutting, adhesive application, and finishing tools. The exact selection depends on the material and installation system.
| Tool | Purpose |
|---|---|
| Laser level or plumb line | Establishes accurate vertical reference lines |
| Measuring tape | Measures wall dimensions and installation layout |
| Sharp utility knife and replacement blades | Produces clean, controlled cuts |
| Straightedge or trimming guide | Guides cuts near ceilings, baseboards, and architectural details |
| Smoothing brush or plastic smoother | Helps position wallpaper and remove trapped air |
| Appropriate adhesive and application roller | Provides the specified adhesive coverage |
| Seam roller, when permitted | Helps seat suitable wallpaper seams |
| Clean sponges and microfiber cloths | Remove approved adhesive residue |
| Worktable | Supports measuring, cutting, and inspecting strips |
| Stable ladder or work platform | Provides safe access to elevated areas |
Not every tool is appropriate for every wallpaper.
For example, aggressive smoothing can damage delicate surfaces, and excessive pressure from a seam roller may flatten textured materials or force adhesive out of the joint.
Professional tip: Keep replacement blades available throughout the installation. A blade that worked well for the first few cuts may already be too dull for a clean finish on the next section.
Wall preparation is one of the most important factors affecting wallpaper performance. The substrate must be structurally sound, properly repaired, clean, dry, and compatible with the specified primer and adhesive.
Many Colorado homes have orange-peel or knockdown wall textures. These surfaces may require additional preparation before wallpaper can be installed successfully.
Check for loose paint, cracks, damaged drywall, moisture, old adhesive, and uneven areas.
Pay special attention to corners, window returns, baseboards, and areas where previous repairs have created differences in surface texture.
Any active moisture problem must be resolved before installation.
Fill holes, repair damaged drywall, and sand uneven surfaces as needed.
Heavily textured walls may require skim coating to create an appropriately smooth substrate. The necessary finish depends on the wallpaper construction, surface sensitivity, lighting, and manufacturer specifications.
Simply applying several coats of primer over a textured wall does not eliminate the texture.
For a more detailed explanation, see our guide to installing wallpaper on textured walls.
A suitable wallcovering primer helps prepare the substrate for adhesion and can improve future removability.
However, no single primer is appropriate for every surface or wallpaper system.
New drywall, previously painted walls, repaired areas, and specialty substrates may require different preparation products.
Allow repair compounds and primers to dry or cure according to the applicable product instructions before proceeding.
Enjoy The Wall also provides wallpaper removal and wall preparation when existing surfaces are not ready for installation.
The following workflow describes the general sequence used for many traditional wallpaper installations. It is not a substitute for the specific hanging instructions supplied with the wallcovering.
Measure the height and width of the installation area, accounting for windows, doors, corners, and architectural details.
Review the wallpaper width and pattern repeat before calculating quantities.
A large pattern repeat or drop-match design can require significantly more material than a random-match wallpaper, even when the wall dimensions are identical.
Use the Enjoy The Wall wallpaper calculator for an initial estimate, then verify quantities against the actual product specifications and layout.
Important: Material calculations should be completed before cutting or installation begins.
The first strip establishes the alignment for the surrounding installation.
Use a laser level or plumb line to create a true vertical reference.
The starting point should be selected based on the wall layout, design, pattern placement, and visibility of seams.
For example, a large floral motif or geometric pattern may need to be centered on a feature wall rather than started from the nearest corner.
Corners are not always perfectly straight, so using one as the primary vertical reference can cause alignment problems farther across the wall.
Follow the manufacturer’s specified installation method.
Paste-the-wall: Adhesive is applied directly to the prepared wall before positioning the strip.
Paste-the-paper: Adhesive is applied to the wallpaper backing. Certain materials require a specified booking or relaxation period before hanging.
Pre-pasted wallpaper: The adhesive is activated according to the manufacturer’s instructions.
Peel-and-stick wallpaper: The material uses its factory-applied adhesive and requires careful substrate evaluation and controlled positioning.
These systems are not interchangeable.
For example, using the wrong paste or applying unnecessary moisture to a sensitive material may cause staining, dimensional changes, or adhesion problems.
Position the wallpaper against the reference line while allowing the appropriate trimming allowance at the top and bottom.
Smooth the strip using a tool suitable for the material, working carefully to remove trapped air without stretching or damaging the surface.
Check vertical alignment before proceeding.
Avoid excessive pressure, especially on delicate printed surfaces, embossed finishes, and natural wallcoverings.
Position each subsequent strip according to the specified pattern match and hanging direction.
For many residential wallpapers, adjacent edges are installed with a close butt joint, without overlapping.
However, certain commercial wallcoverings and specialty materials require overlap-and-double-cut methods or other manufacturer-specified seam treatments.
Do not assume that an overlap is acceptable simply because it makes alignment easier.
Pattern matching also requires attention to material movement. Some wallpaper expands when wet and contracts during drying, making correct adhesive application and handling particularly important.
Our article on why wallpaper seams become visible explains how material construction, wall preparation, lighting, and installation technique affect the finished appearance.
Use a sharp blade and suitable trimming guide to produce clean edges.
Replace blades frequently, especially when cutting thicker or more abrasive wallcoverings.
Take particular care around:
Windows and doors
Inside and outside corners
Crown molding and baseboards
Electrical outlets and switches
Built-in cabinets and other fixed architectural details
De-energize electrical circuits before removing outlet or switch covers, and avoid contact between tools, adhesive, moisture, and electrical components.
Complex architectural details may require additional planning to avoid short strips, visible patches, or awkward pattern transitions.
Inspect the completed sections for alignment, trapped air, edge adhesion, contamination, and other visible concerns.
Remove adhesive residue only using the methods approved for the particular wallcovering. Some delicate and natural materials can be permanently stained by water or cleaning.
Maintain suitable environmental conditions during installation and drying, following manufacturer guidance.
Avoid excessive heat, direct airflow, or rapid changes in room conditions that could interfere with the adhesive’s drying process.
The final appearance should be assessed after the material has had the appropriate time to dry.
Most wallpaper installation problems can be traced to decisions made before or during the first few strips. Understanding these mistakes can prevent wasted material and unnecessary reinstallation.
Raised texture can telegraph through wallpaper, interfere with adhesion, or create visible imperfections.
Thin, smooth, or reflective wallcoverings often reveal substrate defects more readily than thicker textured materials.
A room may require more wallpaper than its wall area alone suggests.
Large repeats, centered motifs, unusual ceiling heights, and architectural features can significantly affect material usage.
An adhesive suitable for one wallcovering may not be appropriate for another.
Always check compatibility with the backing, wall surface, and manufacturer’s requirements.
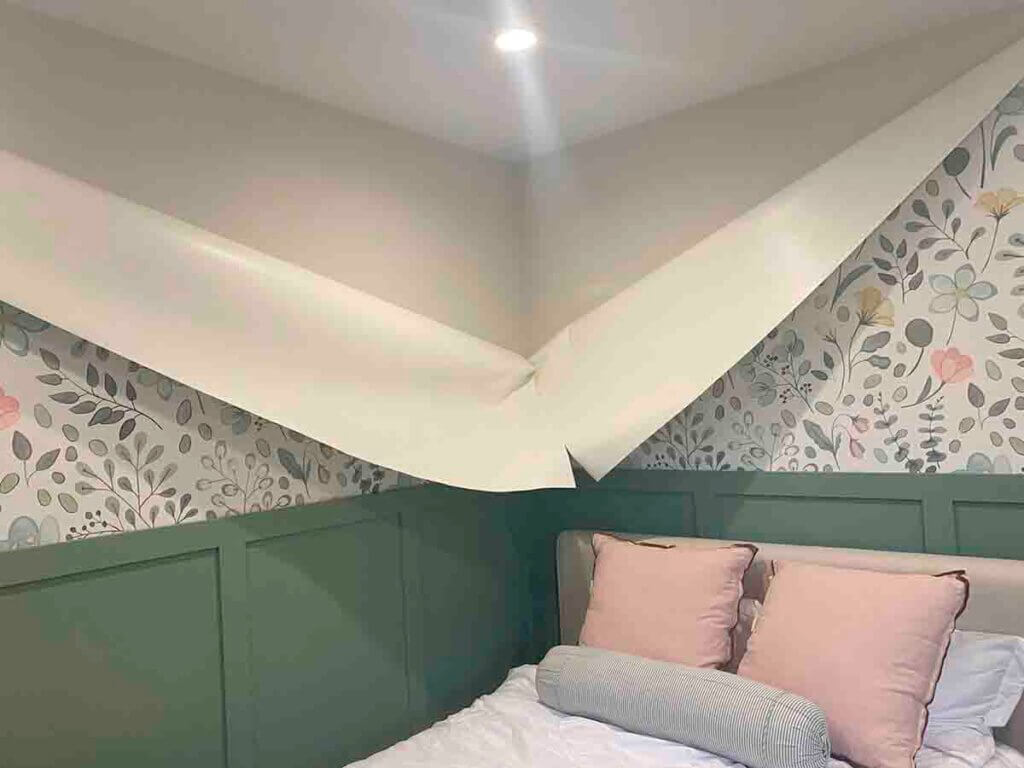
Excessive pulling or smoothing can distort patterns and create tension that affects the seams as the material dries.
Poorly planned cuts can leave conspicuous pattern interruptions, narrow pieces near corners, or insufficient material around openings.
If the first installed strips reveal inconsistent color, visible manufacturing defects, or an unexpected installation problem, stop and investigate before continuing.
Many manufacturers require installers to inspect the initial installed strips before completing the job.
Yes. Wallpaper construction influences preparation, handling, adhesives, seam methods, and finishing techniques.
| Wallpaper type | Important installation consideration |
|---|---|
| Non-woven wallpaper | Often dimensionally stable, but installation requirements vary by product |
| Traditional paper wallpaper | May expand when wet and require controlled booking |
| Vinyl wallcovering | Backing, weight, and intended use determine adhesive and seam requirements |
| Grasscloth and natural fibers | Natural variation, potential staining, and seam visibility require special attention |
| Peel-and-stick wallpaper | Substrate compatibility and adhesive performance are especially important |
| Custom printed murals | Panel sequence, image alignment, and exact dimensions must be verified |
Designer wallcoverings can introduce additional challenges, including delicate surfaces, specialty backings, hand-applied finishes, and manufacturer-specific handling requirements.
For these projects, designer and high-end wallpaper installation often requires more extensive preparation and planning than a standard accent wall.
DIY wallpaper installation can be practical for smaller, straightforward projects when the wall is already properly prepared and the selected material is suitable for a first-time installer.
However, installation becomes more demanding when a project involves expensive materials, complicated patterns, irregular surfaces, high ceilings, or detailed architectural features.
Professional installation provides particular value when:
The wallpaper has a large or difficult pattern repeat.
The surface requires significant preparation.
The material is delicate, natural, or expensive to replace.
The installation includes stairwells, ceilings, or tall walls.
A custom mural requires precise panel positioning.
The project has a limited installation schedule.
Professional installation does not eliminate inherent material characteristics. For example, natural grasscloth may have visible seams and color variation even when installed correctly.
The goal is to select the appropriate installation system, reduce avoidable problems, and achieve a result consistent with the material’s specifications.
At Enjoy The Wall, we approach wallpaper projects as a complete process: Select • Source • Plan • Install.
That means reviewing the material and wall conditions before installation rather than treating wallpaper hanging as an isolated final step.
Proper wallpaper installation starts before the first strip is applied.
Surface preparation directly affects adhesion and appearance.
The wallpaper manufacturer determines the appropriate installation method.
Accurate layout planning helps control pattern placement and material waste.
Different wallcovering constructions require different handling techniques.
Good seam alignment depends on the material, substrate, and installation system.
Specialty materials and complex installations may benefit from professional evaluation.
Yes, if the painted surface is sound, clean, dry, properly prepared, and compatible with the wallpaper system.
Glossy paint, damaged surfaces, and contaminated walls may require additional treatment. A suitable wallpaper primer is generally recommended.
Some products may tolerate limited texture, but many wallpapers require a smoother surface.
Skim coating or other preparation may be necessary depending on the texture depth and wallpaper construction.
No. Some wallcoverings naturally have visible seams, even with correct installation.
Seam appearance depends on material construction, pattern, lighting, wall color, and installation technique. Natural grasscloth is a common example.
Installation time depends on wall preparation, room dimensions, material type, and architectural complexity.
A prepared accent wall may be relatively straightforward, while large rooms, tall walls, custom murals, and designer materials can require more extensive planning and labor.
Most conventional residential wallpapers are installed with butt joints, but exceptions exist.
Certain commercial and specialty wallcoverings require overlapping and double-cutting. Always follow the specified installation method.
Yes, many straightforward wallpaper products are suitable for DIY installation.
Choose a manageable wall, review the manufacturer’s instructions, and ensure the surface is properly prepared. Expensive or technically demanding materials may justify professional installation.
Dry indoor conditions can influence adhesive working time and drying behavior, depending on the product and environment.
Stable room conditions, appropriate adhesive application, and manufacturer-recommended temperatures and humidity levels are more important than relying on assumptions about Colorado’s climate.
Yes. Enjoy The Wall helps homeowners, designers, and contractors with wallcovering selection, sourcing, technical review, quantity planning, and professional installation.
This approach allows material compatibility, preparation requirements, and installation details to be considered before the wallpaper is ordered.
Have questions about wallpaper installation, wall preparation, or choosing the right material for your project? The Enjoy The Wall team can help you evaluate your options and plan your installation throughout the Denver metro area and Colorado.
+1 (720) 825-7157
Proudly working with clients statewide.
Planning a wallpaper installation in the Denver metro area or elsewhere in Colorado?
Enjoy The Wall works with homeowners, interior designers, builders, and commercial clients on projects ranging from individual accent walls to large-scale wallcovering installations.
Our team can help evaluate wall conditions, review materials, coordinate sourcing, plan the layout, and complete the installation.
Explore Wallpaper & Wallcovering Services · All Services
For Interior Designers, Architects & Builders · View Recent Projects

Find wallpaper, decorative plaster, brands, guides, FAQs and blog articles.